
Earlier this Spring, my local quilt store, The Patchwork Place moved and had a grand opening sale. I picked up two small pieces off of the bargain table not knowing what I'd do with them...they were just cute and sort of coordinated! Do you ever buy fabric like that? If you love it and it's cheap, I say, go for it!!

It turns out, the pieces I bought worked well for a little layered skirt for Marie...they were approximately 9 and 10.5 inches long each when I bought them. Because the one was a bit longer then the other, I able to layer the two pieces, and put in a simple elastic waistband to construct the skirt. Pretty simple actually, but I thought a photo tutorial might be fun, so here we go.
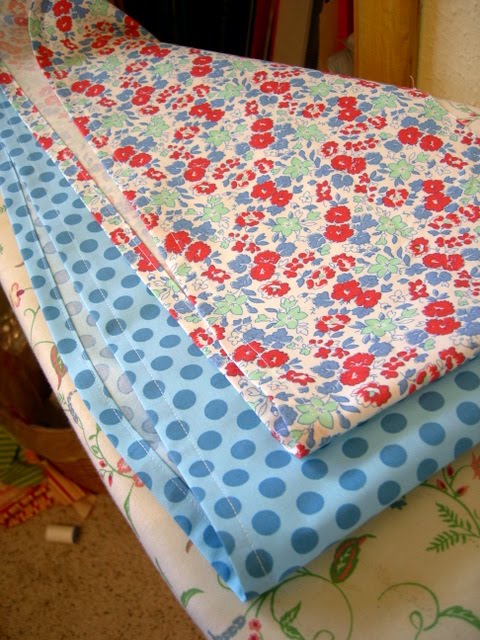
My fabric pieces were 9 and 10.5 inches tall. This was perfect for a size 24 mo. skirt for my daughter. You would need to use taller pieces for taller girls. I ended up using the full width (44inches) of the fabric for the width of the skirt. In my opinion, this ended up being a bit too full and for Marie's waist. I had trouble gathering the bulk tight enough to fit her. For bigger girls, I think the full fabric width would be great, but for smaller sizes, I'd cut it down some in the future.
In the first picture above, I sewed up the side seams and put in the 1/2 inch hems for both pieces. The top layer (the floral print) is 1.5 inches shorter then the bottom piece.

Next I layered the blue polka dot piece (the longer, "bottom" piece) on top of the floral piece (the shorter "top" piece) with both pieces facing right sides up and sewed along the top edge about 1/2 inch from the edge. This feels "wrong" because I want the finished skirt to have the floral print on top with the blue dot peeking out along the bottom, but when you finish sewing the seam and turn it to the inside, you will have a finished edge along the top waistline and the two skirt layers to be facing out right (see below).

It's hard to see in this photo (above), but after I turned the blue polka dot piece to the inside, I sewed a casing for the elastic waistband. If I'm using 3/8 inch elastic, I sew about 5/8 inch down from the top edge, leaving a 1 inch opening to insert the elastic.
Insert elastic and sew up the opening and you'll have a little twirly skirt!!


Here's the finished skirt on Marie....she's my little sweetheart!
enjoy!
Jessica
So cute. Thanks for the how-to.
ReplyDeleteVery cute! I love having the double layer for coordinating prints :)
ReplyDeleteso cute indeed! :)
ReplyDeleteThanks, it is really sweet!
ReplyDeleteShe's so cute! I love the double layer look.
ReplyDeleteThat turned out adorable. Cute fabric combo.
ReplyDeleteGreat idea! The skirt turned out so cute and Marie is a doll!
ReplyDeleteWhat an adorable idea! I love the pattern too! Super cute and perfect for summer...now I just need some baby girls!! :)
ReplyDeleteGreat look. Easy enough with the tute.
ReplyDeleteCheck out this free quilt pattern giveaway at Created by Chancy. B.
Super cute! I have a little redhead daughter, too. They are just the best.
ReplyDeleteThis is so great - I had to make one for my daughter (same age) - I've gotten lots of compliments on it!
ReplyDeleteSo cute! I had to make one for my 20-month old daughter (I used 36" of fabric, and it worked great). Thanks for sharing - I've gotten lots of compliments!
ReplyDeleteThis is just darling! Can't wait to try it (and I've linked to your blog : ).
ReplyDeleteWhat a darling skirt! I'm going to make one for my granddaughter who is about the same age as your adorable daughter
ReplyDelete