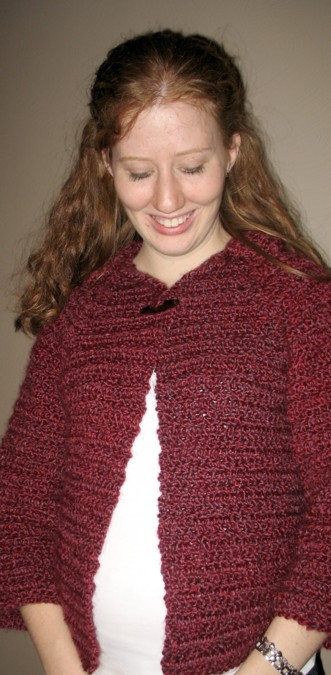
It's finally finished! One and a half months after starting this sweater for Jessica, I finally finished it and gave it to her today. Jessica seemed to like the sweater, so that made me happy. :-) Doesn't Jessica look lovely at 5-1/2 months pregnant?!
Ruth
The pattern I used was a freebie from Hancock Fabrics called the "Matinee Swing Jacket." I thought I would review this croched pattern following the format found at Patternreview.com.
Pattern Description: A crocheted swing style sweater jacket with 3/4 length sleeves.
Did it look like the photo/drawing on the pattern envelope once you were done sewing with it? Yes, except for the neckline
Were the instructions easy to follow? This pattern is rated for intermediate crocheters, and I will agree. Other than baby sweaters, this is the first adult garment that I've crocheted. I found the instructions easy to follow, but I did have a few problems with the instructions for the front pieces.
What did you particularly like or dislike about the pattern? I liked that the pattern did give good illustrations of each piece which was helpful to me as a first-time sweater maker. However, I did feel like the instructions were vague when telling how to decrease in the front sections. The instructions did not give specific stitch counts and when I got to the end I found I did not have enough stitches. I had to undo several inches and start over several times before I got it to work out right. Even so, the neckline ended up being too tight.
Yarn Used: Lion Brand Homespun in the color "Antique."
Pattern Alterations or any design changes you made: I lengthened the sweater by 2 inches, but I think I should have lengthened it even more. Jessica has a long waist, and it seems a bit short on her, in my opionion. Of course, it may just be her pregnant belly making the sweater seem short-waisted.
Also, in order to accomodate the tight neckline, I ended up closing up the buttonhole and sewing the button down a few inches lower than the pattern called for. This created a bit of a lapel which both Jessica and I liked better anyway. We used a toggle button which really looks good.
Would you crochet it again? Would you recommend it to others? I might make it again---this time for myself. :-) I'd recommend it with precautions about the front sections.
Conclusion: Overall, I am very pleased with the sweater. Other than the problem mentioned above, the sweater went together very well. It was easier than I thought it would be to crochet, and now I'm ready to attempt something more complicated.

 For this pumpkin pincusion, I basically used the Paisley Pincusion pattern, but mine came out larger then I wanted because I didn't do the extra line of stitching on the seams to make "petals" like the pattern shows. I forgot to read the directions...oh well. I still like it!
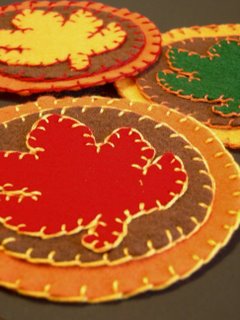
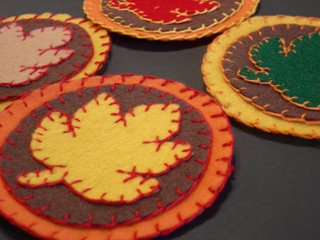 This felt coaster set has been so fun to work on this week! The pattern was from a library book, Holiday Touches for the Country Home, and it was so easy.
To duplicate them, cut out two circles, one larger then the other, and a maple leaf design from contrasting colors of felt. Layer them, secure the layers with craft or fabric glue, and them stitch them together with a blanket stitch in a contrasting color. Use 6 strands of embroidery thread for the blanket stitching.
I want to make some Christmas coasters next...I thought I would just use my Christmas cookie cutters as simple patterns for a tree, star, stocking, snowman etc.

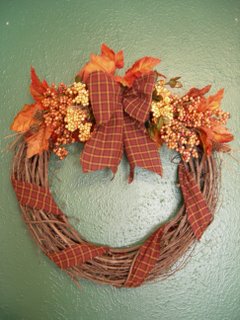 Last week the holiday bug hit me and I've been feeling like creating, and cooking, and puttering, and nesting in my little house. Saturday we finally broke down and bought the electric fireplace and mantle for out living room that we've wanted for so long. Our living room is so cozy....I love it.This is my new fall wreath in my eating area. I know it doesn't look the best on the bright green wall, but for right now, that's just the color the wall is, and I live with it. This little project was so easy to make...and fairly inexpensive. I'd gotten the wreath at a garage sale last summer for $2, and the fake leaves and berries I got at WalMart--3 little bunches at $0.94 each.First I used some leftover fabric scraps from another project to wind around the wreath (about 1/4 yd). I ripped the strips rather then cutting them to create a ragged look.Secondly I cut the 3 bunches of leaves and berries apart into individual stems, and then used floral tape to bunch them up separately, 6 little bundles, 3 for each side of the wreath. I laid bundles on the wreath to see where I wanted them to go and then wired them in place, starting with the leaf bundles on the bottom, the orange berries overlapping them, and then the yellow berries on top. To finish I simply wired a big bow in the center and secured a couple leaves in at the top to cover a bare spot.
 Justin putting together our mantlepiece for the electric fireplace.
Happy Thanksgiving!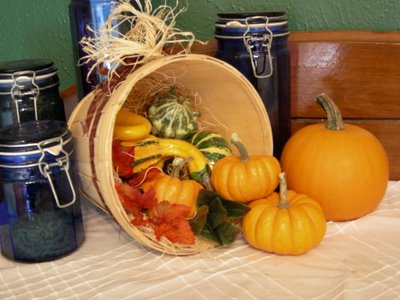
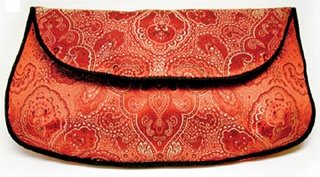 This morning I came across this free clutch pattern from Kwik Sew.
I thought it was really cute and would be fun to make for a special event, or just for a fun makeup bag! It would be easy to dress up with trims, embroidery, applique, or beading.
I also been enjoying all the pictures at Emma's Sewing Site. I'm in the mood to do some garment sewing again, and all her maternity and nursing sewing is inspiring.
Today is a rainy day and I feel like sewing! Yea!
Jessica
 Justin and I had an ultrasound last Thursday and we were excited to find out that we're having a baby boy!
Everything looked good with the baby...all the measurements were normal and the technician didn't see problems or concerns. We are blessed that God is giving us a healthy pregnancy and baby thus far.
I just thought everyone would want to know!!
Jessica
Saturday, Mom and I hosted a small bridal shower for a dear friend of mine, Tonya. She's getting married in less than 2 weeks and we were so excited to celebrate with her. The luncheon menu consisted of Italian soup, Chicken salad sandwiches, Ham and cheese sandwiches, and sides of pickles and olives, cheese and crackers, and grapes. For dessert we had fancy little petit-four cakes, and cream cheese eclairs.
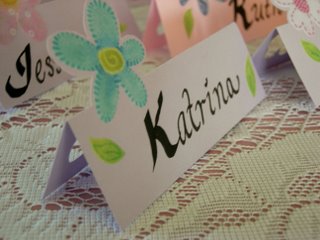
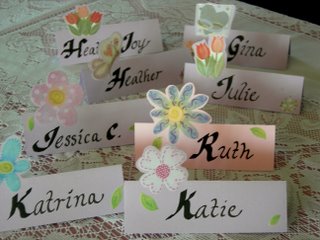
I made little name place cards for each person, and I thought they came out cute! They were so easy to make and gave a very elegant feel to the place settings.
To made them, I cut rectangles of purple and pink cardstock, 3" by 4 1/2". I placed the stickers on them so that they would stand well above the center when the card was folded in half lengthwise. I semi folded the card in half carefully, trying not to bend the sticker too much. I then used an x-acto knife to cut out the outline of the sticker on the top half. Once the sticker was cut out, I was able to completely fold the card and write the names on them with a calligraphy pen.