Showing posts with label Wedding. Show all posts

Tuesday, January 10, 2012

Christmas Wedding


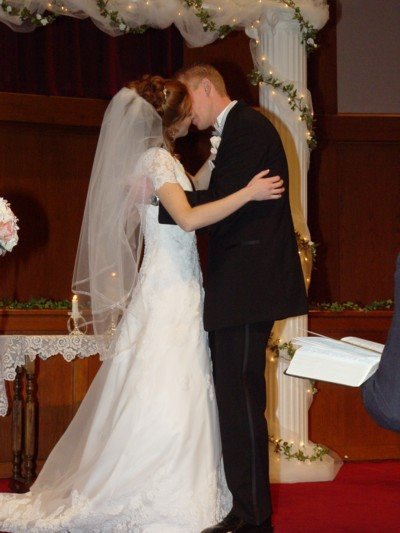
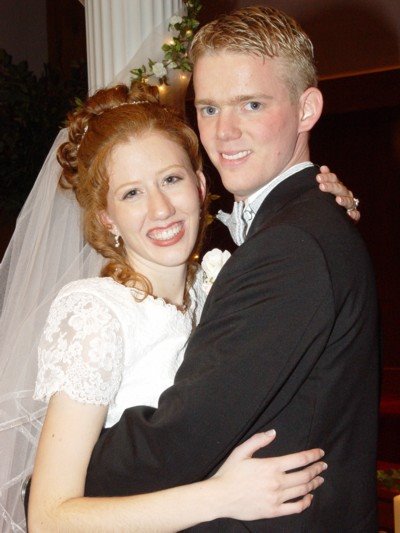
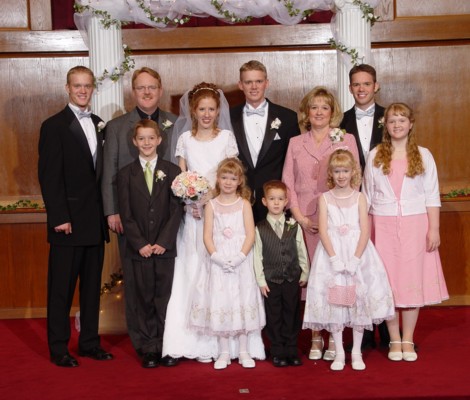
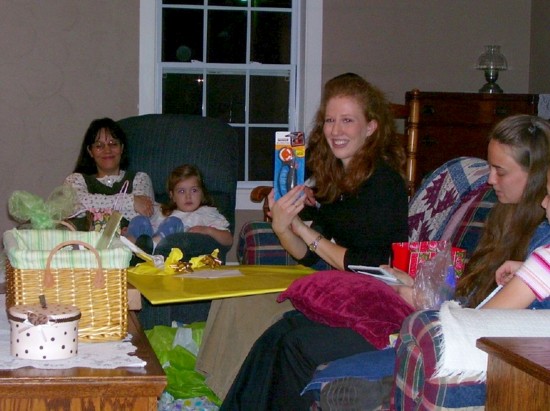
It has been 2 weeks since Katie was married! Two weeks already, and I meant to post a few pictures before now. I now have 3 married daughters--I can't believe it when I think about it. The girls are still my babies, but now the oldest 3 are married and all grown up.

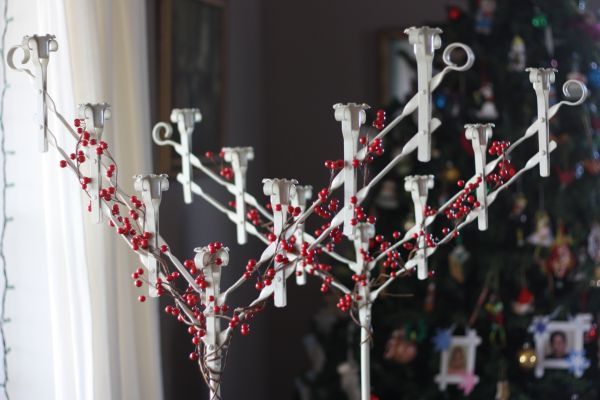
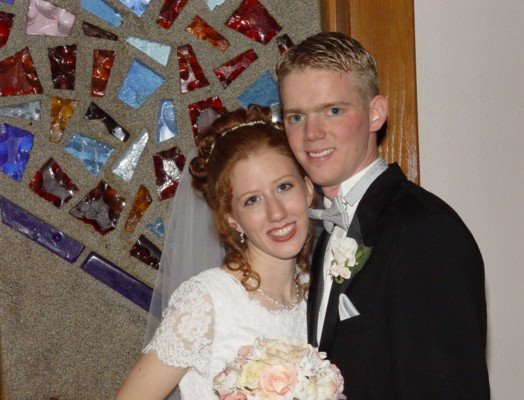
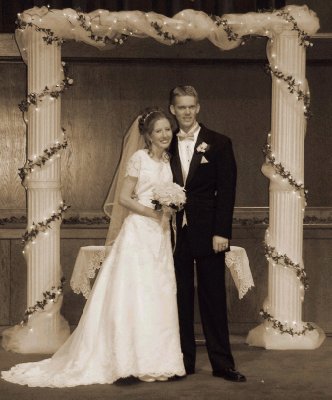
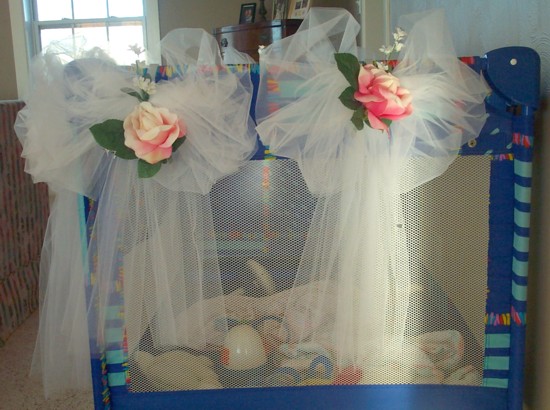
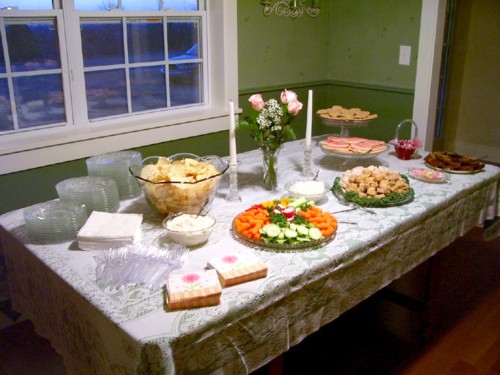
The wedding was beautiful, and Katie was a lovely bride. I thought I'd share some snapshots of the decorations. Because the church was still decorated for Christmas with a tree and poinsettias, Katie decided to go with a red berry theme for her decorations.

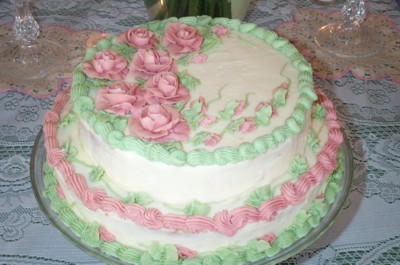
Berries on the candelabras, on the pew bows, on the bird cage card holder, berries on the cake, and berries in the table centerpieces....it was simply delightful. By the way, the centerpieces were upturned glass goblets with red tea lights on the top and berries and greenery underneath, and the idea came from Pinterest. Gotta love Pinterest for great ideas!

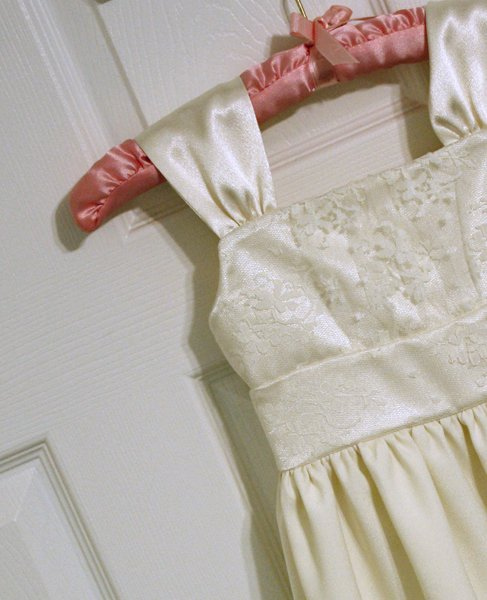
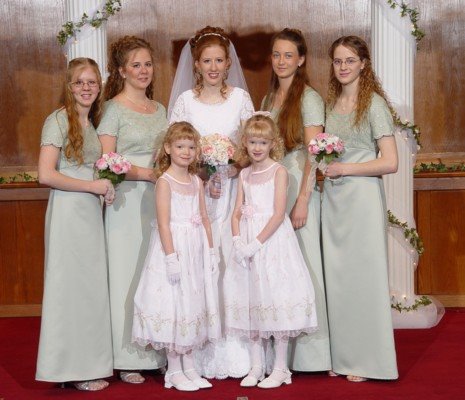
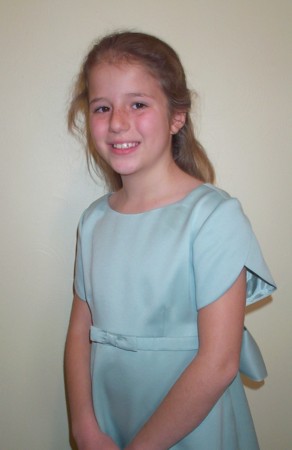
Oh, one last thing, I still want to round up some pictures to show you of my youngest daughter and my 2 granddaughters wearing their wedding finery, especially since this is a sewing blog and Jessica and I sewed the dresses. Another post for another day....

blessings,
Ruth


Monday, January 09, 2012

Two Flower Girl Dresses

Finally, here is the finished dress I made my 6-year-old daughter for her sister's wedding. The pattern is New Look 6065, size 3 width with a size 5 length.

I also sewed this next dress for my 19-month-old granddaughter. My other granddaughter's dress was sewn by her mommy, Jessica, who I hope will post pictures too.


Tavi's dress is a McCall's 6268, views C and D combined. The pattern comes in sizes S, M, L, and XL. I made a size XL, and it fit perfectly. I used the same crepe backed satin as Emily's dress, with the matte side as the right side. For the sleeve bindings and the bloomers, I used the satin on the outside.


Take a look at the beautiful flower that Jessica made for Tavi's dress. Somehow or another she cut the flower petals out of satin and melted the edges. If you're interested, I'm sure Jessica can tell you how she made the flowers. Yes, flowers--she made 4 total--one for each of the 3 flower girls' hair, and one for the front of Tavi's dress.


The three flower girls each wore these sweet little blue beaded bracelets that I made. (I'm almost afraid to admit it, but I think I want another hobby--beading. These bracelets are simply beads strung on elastic thread, but oh, they were so fun to make. And now I want to make more. And more elaborate. Oh, the fun I could have if I decide to take up beading!)


Once I get them from the wedding photographer, I will post pictures of the girls wearing their lacy dresses. Can you believe I didn't take ANY photos with my camera?!

Blessings,

Ruth

Sunday, November 20, 2011

Flower Girl Dress: New Look 6065

Wedding plans are coming along. Katie is getting married in 40-something days. I finally finished Emily's flower girl dress, and I'm ready now to start Tavi's dress.


For this dress, I used New Look 6065. Funny thing, Emily is 6, but I made the size 3 pattern with the size 5 length. The dress fits her perfectly, skinny thing. I practically did a happy dance when my invisible zipper went in almost perfectly the first time. Okay, it's a smidgeon off (see waist band) but not enough for me to get uptight about. I decided to leave it. :)


Pattern changes: I added gathers to the front bodice by adding 3-4 inches to the width of the front bodice piece. I also added length and a lace-edged lining to the skirt; the dress is almost floor length. Pictures will come, but probably not until after the wedding when Emily is dressed up and has her hair combed. :)

Thanks for reading!
Ruth

Monday, October 24, 2011

Wedding Sewing


My 3rd daughter, Katie, is getting married in December! Plans are coming along. My next sewing project will be to make 2 flower girl dresses--one for Emily and one for my granddaughter in Switzerland who is 1 year old. Jessica will make Marie's dress. Yes, there will be three flower girls, and they will look adorable, I'm sure!

We choose ivory lace and ivory crepe fabric for the dresses, and will use the matte side as the right side. I'm excited to get started...now if school and music could be put on hold, I just might find time to sew!

Ruth


Good times:
making the silk flower bouquets,
corsages, and
boutonnieres
with sweet friends
!

Wednesday, April 05, 2006

WEDDING PICTURES


Jessica and Justin
March 18, 2006

For more pictures, go here.


Tuesday, March 21, 2006

Mr. and Mrs!

Jessica and Justin are married! More pictures to come soon, when time allows.
Ruth


Jessica and Justin
March 18, 2006

Monday, March 13, 2006

Pew bow pictures


We are getting stuff done....with the help of some very good friends!

Last night a several friends came over and were able to completely finish the favors, get some sewing done, and make all the pew bows, all while Justin and I packed up a bunch of my stuff. I was amazed with how much got done and that we crossed 4 major things off our list in one evening. Our friends were truly a blessing to me.

These are the finished pewbows...hanging on our playpen. =) I was SO pleased with how they come out! They were simply big bows of tulle that poofed out to be so pretty. The roses were wired into the center and go so well with my rose flower scheme. Mom and her friend made 12 of them.


Cutting and measuring yards and yards of tulle. Notice our new red walls in our eating area? We love them!

The girls helping with making the favors.


My sister, my maid of honor, and my friend. I love you Heather!


My dad and Justin doing dishes. =)

veil and hair pictures


I don't have a lot of time to post a lot, but I thought I'd put a few pictures of my veil and trial hairdo. Here you can see the edging I went with for my veil. It was so easy--I used about 7 yards of sheer organza ribbon and simply sewed in around the edge of the tulle before it was gathered. I trimmed the tulle close to the stiching and then gathered and sewed in to the hair comb. The veil cost me around $12....not bad when you consider that the ones I saw in bridal shops range from $49 to $200.

I have a LOT of hair! We did a trial updo on my hair last Wednesday. It looked so pretty and I was happy. It was very soft with lots of curls.
Jessica


Tuesday, March 07, 2006

Veil link

Yesterday I was finally able to finish the veil for my dress. It is big, it is poofy, it is white, and it is beautiful. Everything a veil should be. It is two layers, but I don't plan to use the blusher over my face. It will be worn at the top of the back of my head. I want some hair in front showing, but I don't want the veil too low either.

I had a hard time deciding what kind of trim to finish the cut edge with...I did samples with the serger, with a zig-zag stitch, with narrow 1/8" satin ribbion and with 1/4" organza ribbon. I finally decided to go with the organza trim because the most people liked it, and I felt like it echoed the organza overlay of the skirt. Unfortunately I don't have any pictures right now....maybe later.

The only thing I'm worried about is that it seems a little heavy for the clear plastic comb I sewed it only, and I'm afraid that it's not going to stay put very well. I'm having nightmares of the veil falling off as I walk down the aisle. The lady that is going to do my hair for the wedding is coming tomorrow to practice, and I'm hoping that she'll have some good ideas for anchoring it to my head!

I did some internet research before I started, and I really didn't find that many really helpful websites. This link was the best and most helpful one that I could find. There were lots of places that sold veils with good pictures of the various trim and fullness options but very few that told how to actually plan it and sew it to the comb. I think I was making it a bigger deal then it really was, because it really was quite easy once I did it. Maybe I should start making veils and selling them on e-bay. =)

11 more days!!!!!!

lots of love,
Jessica

Monday, March 06, 2006

Capelet Revisited


Remember the furry capelet I made in February? Before I made it, I looked in 3 different fabric stores for some furry fabric that was more furry than the stuff I used. Last week I was in a little town with a little WalMart, and lo and behold they had the furry, furry fur in white. Being the perfectionist that I am, I bought some and made another capelet. We still have leftover satin from Jessica's wedding dress so all I had to buy was the fake fur and some ribbon. I finished the new capelet this afternoon. Don't you agree that the furry fur looks better than the not-so-furry fur? That's a lot of furrys(?) ... furries(?).... okay, fur! :-)
Ruth


THE NEW MORE FURRY CAPELET:


THE OLD LESS FURRY CAPELET:

Wednesday, March 01, 2006

Shower Flowers


The sweet ladies who hosted another wedding shower for Jessica this past Saturday gave both of us these lovely flowers. After 5 days, the flowers still look lovely. We are both enjoying them immensely.


Everything at the shower was so nice. The cakes were beautifully decorated by 2 girls, friends of ours, and the party was hosted by such sweet ladies. Again, Jessica and I both feel so blessed to have such wonderful friends.
Ruth


Monday, February 27, 2006

Finishing touches

Today I finished my wedding dress. Yipee!!! After an entire afternoon spent handsewing lace onto the skirt, I still can't believe it's done. I finished sewing all the lace motifs onto the skirt, I sewed the snaps onto the bra carriers in the shoulders, and I appliqued a label into the bodice. All that remains is to press the skirt and to try it on with my necklace that came today in the mail.

The finishing touch to the dress, and the last stitches I sewed on it was a special applique that I put into the bodice. Embroidered in blue and surrounded by a border, it had my name, Justin's name, and the date of our wedding. The label was a special gift from Carolyn at Helen Enox. She helped us so much as we picked her brain with lots of questions about bridal sewing, and she was so gracious in offering to embroider this label for me. I was pretty excited about it, because it was just the perfect finishing touch, and will be something I will always remember.

Jessica


Ellie's "grown-up" dress

I finished Ellen's dress last week. No problems with sewing it, but I think I want to take in the shoulder area since it's too big there. I should have done a better job fitting it to her before sewing. It won't be hard to fix it, but I sure don't like having to do things twice. Really, I shouldn't have been in such a hurry the first time around!

Ellen is very happy with her "grown-up" dress. I would have preferred a poofy, fru-fru little girl's dress, but my 10 year old Ellie is ready to grow up. When we picked out the pattern together, she vetoed anything with gathers or puffs. I barely got by with adding the tulip sleeves since the pattern called for no sleeves. Overall, I'm happy with the dress and it does look nice on Ellen.

Ruth


Wednesday, February 22, 2006

The lace border


I really shouldn't even post these pictures, because I want there to be some element of suprise on the wedding, but I can't stand to not show everyone. The lace added to the skirt of the dress changes it SO much! Shown below is the border that goes around the entire hem of the organza overskirt. I applied this by machine with a zig-zag stich, and that worked fairly well. It's not perhaps as flat looking as it would have looked if I'd sewn it all by hand, but it was a LOT faster, and I think it looks pretty good.

All the pieces above the boder (the ones that aren't attached to the boder) were leftover from the original border. Once I cut the motifs apart, there was just enough to go all the way around the skirt once, making the boder deeper and more intricate. That was pretty amazing because we didn't plan it that way at all! We just happened to have that much extra. I guess Mom's habit of always buying too much fabric comes in really handy sometimes!

It took me forever to decide how to place the extra motifs around the border--I pinned and re-pinned and tried all different ways, but I finally decided to arrange them with equal weight all around the skirt (rather then putting more in the back or on the seams for instance).


I am now in the process of of hand-sewing all the extra motifs from the bodice lace to the skirt. I'm very pleased with how that looks--it's transforming the dress into a work of artistic design, in my opinion. I am so happy with how it is going to look...but you will have to wait till the wedding to see it!

When we bought the fabric, I was hesitant about using organza for the sheer overlay because all the rtw dresses that I liked used some sort of extra strong tulle type material that had a little stretch to it. Unfortunately we couldn't find any of that sort of material, and didn't have time to special order it, so I made the decision to go with organza. It was still sheer, but it didn't have that same type of texture as the tulle overlays, and I was worried about it looking right with lace on it. But needless to say, the organza seems to be working really well. It does have a slightly different look though--a little more body and shine vs. the drapey soft look of the tulle base. I wonder why none of the rtw dresses never use organza for their lace base? All the wedding dresses I've seen with sheer lace overlays have a base of this super-tulle material. By the way, if anyone knows where to buy this tulle that I'm talking about, I'd love a source. I'm sure it's available somewhere, but I don't have any idea where!

Jessica

Pictures from the Notion Shower


Mom wrote about the sewing shower that was held for me last Thursday, and now I'm posting a few pictures.
The first is the food table (always very important at such gatherings!). We had chips, cookies, veggies,
and tortilla pinwheels. I thought it looked quite elegant!


The whole shower was such a special time for me. I felt very, very loved, and I am very thankful for the good friends and neighbors we have here.

Mom did a really neat devotional using some of the different notions as a visual to impart wisdom and counsel for my marriage. She talked about how I need to remember to use a seam ripper to go back and take out angry words or unkind actions. I need to treat my marriage like the delicate piece of lace I'm using for my dress. I shouldn't use my "scissors" (tongue) to slash into it and damage it, but take care and consideration with it like I do with an expensive piece of lace. She talked about how a thimble is used to protect one's finger in quilting, and how I need to protect my husband once I am married. I need to protect his reputation and his good name, taking care to build him up with my words. Finally, a tape measure is used as a standard in sewing--it is important to always use a ruler for accuracy in sewing, and in the same way, I need to always remember to use the Bible as the standard for my marriage. I should always look to it first for the wisdom to build a strong marriage. Mom's counsel was really special to me, and it meant a lot that she shared all of that like she did. I was really proud of her, and I will remember her wisdom whenever I use those notions!

I am so thrilled to have my future sewing room stocked with all the little necessary notions--pins, needles, seam rippers, thread, etc. I really look forward to setting up sewing in my future home. It's one of my dreams to have some sort of home business doing custom sewing and alterations someday.


This is my friend and bridesmaid, Tonya. She and her mom and sisters hosted the shower and made it all possible. They are such special friends.

I thought the basket to put all the little notions into was the perfect finishing touch! I love storage containers--baskets, boxes, crates, and bags!

that's all for now!
Jessica

Wednesday, February 15, 2006

Almost done!

I have been making slow but sure progress on my wedding dress--I'm still hoping to have it done by my goal of Feburary 18th, but if I don't make it, I'll be ok with that too. It's gone so well that I really haven't put nearly as much work or stress into it as I thought I would. I have been really, really busy with the house stuff too, so that has kept me from working on the dress a lot of days.

The hem on the satin and lining is finally completed. We used a completely new (to me) technique--after the zipper was put in (by my wonderful mother!) we left a large area open in the center back lining seam. I pulled the raw edges of lining and satin hems though this hole and sewed the hem by stiching the lining and satin right sides together. Then I sewed the horsehair braid to the satin side of the hem's seam allowance. When it was all pushed back through the hole in the lining, walah! we had a completely finished hem at the perfect length....I wish! Unfortunately it was a bit too long so I had to take out the horsehair braid I'd already sewn in and redo the front hem, raising it about 3/4 inch and tapering that into the sides of the train. Mom said that it served me right... I should have basted then tried it on first before sewing it. She always says that...and I hate basting!
  • To do still:
  • Re-serge hem on organza to proper length.
  • Apply lace border to hem of organza --I'm thinking about doing this by machine because the lace is fairly sturdy and it'll take forever to do by hand.
  • Cut lace motifs apart and sew them scattered around the skirt area.
  • Sew snaps on the ribbon bra carriers in the shoulder area.
  • Final pressing.

This is a picture of the armhole seam binding. I've never done this technique before--normally I just serge the armhole seam, but a wedding dress deserves better. Because of all the layers in the bodice, it works best to do a bias binding. I made it from my lining fabric, cut an 18 by 2 inch strip on the bias, folded it lengthwise and pressed. I applied it by hand, first to the bodice side and then to the sleeve side of the armhole. I trimmed and clipped my seam because it was pretty bulky. After that was done, I turned the bias-bound seam toward the bodice so that it wouldn't show through the sheer sleeve. I tacked it down at both the underarm and shoulder seams to hold it in place. I didn't tack it down all the way around because it seemed like it didn't want to lay flat on the sides and I didn't want there to be any pulling or stress in that area.


This is the finished sleeve in the dress. The sleeve is the only thing about this dress that didn't turn out exactly like I'd imagined. I'm not even sure how I could have created the exact look I wanted, because I didn't have a pattern or even a picture. Regardless, this sleeve is still pretty and I'm happy with it.


Here you can see the lace trim I applied around the entire neckline. It blends in perfectly, and softens the neckline, making it look more feminine and pretty!

I really love the curve of the back neckline. I like the back of the dress almost better than the front. I am definitely planning on doing my hair up.


The buttons are all sewn on now....there are 40 total!

That's all for now,
Jessica