I haven't posted in awhile, but I have been busy trying to finish up a bunch of PIGS (Projects in Grocery Sacks).
This shirt I made Katie had been on my sewing table, cut out and ready to sew for over a month. Once I sat down to work on it, it took no time at all. The knotted buttons were the hardest part of the pattern. :-) The only alteration I had to make for Katie was to take some width out of the body of the shirt. I used a Simplicity "It's So Easy" pattern, and honestly, it was very easy.
Whenever I sew for one of my girls I am always afraid that they won't be pleased with the end result. Katie gave me no reason to fear, however; she was thrilled with the way her top came out and the way it fit. The shirt has already been worn on more than one occasion and it really does look nice on Katie.
On to the next pigs...
Ruth
Saturday, December 23, 2006
Tuesday, December 12, 2006
Felt Ornaments
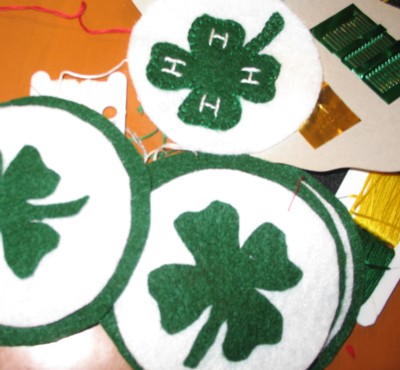
Inspired by Jessica's coasters, my mother and I made felt ornaments while she was visiting us for Thanksgiving. Mom, creative as she is, sketched out simple patterns for our use. We made two of each design, 1/2 for her and 1/2 for me. I also made several ornaments with the 4-H clover to include in gift baskets for our wonderful 4-H leaders.
Making the ornaments with my mother was a lot of fun. I cherish the memories that I have of going to fabric and craft stores with Mom. We used to do so much together when we lived back in Colorado, and I do miss those times! I think my love of sewing and crafting was inherited from Mom. She is so creative! Thanks, Mom. I love you!
Ruth
We are quite the messy crafters, don't you agree?
Making the ornaments with my mother was a lot of fun. I cherish the memories that I have of going to fabric and craft stores with Mom. We used to do so much together when we lived back in Colorado, and I do miss those times! I think my love of sewing and crafting was inherited from Mom. She is so creative! Thanks, Mom. I love you!
Ruth
Tuesday, December 05, 2006
Felt Coasters for Christmas
Here are some pictures of the felt coasters I made last week. I enjoyed making and using my autumn leaf coasters so much that I went ahead and made a set for Christmas. I used the same size circles as before and just created 6 different Christmas designs for the centers. This was a really easy project that went pretty fast.
Mom is making some some beautiful felt ornaments...and I can't wait for her to share them!
Enjoy this season!
Jessica
Monday, November 27, 2006
The Perfect Pear Pincushion
We like pincushions here and I just came across a cute pear pattern by Stacy that would be perfect for a pincushion. It would also be appropriate for Christmas ornaments or decorations. What fun!
Jessica
Jessica
Tuesday, November 21, 2006
Ear Flap Hat for Emmy
Yesterday I knit a hat for Emily, and yes, she even kept it on long enough for me to take a few pictures of her. I enjoyed this quick project---being able to work on something and actually finish it was quite satisfying to me. Isn't Emmy adorable, dirty face and all? It was hilarious how Emmy went from crying to smiling in less than a minute while the pictures were being snapped.
Ruth
***Edit***
For this hat I adapted a pattern from www.cidermoon.com. The pattern is not sized for toddlers, so I experimented as I knit, making it smaller. For Emmy's hat I started with a cast-on of 63 stitches. I think I should have made it slightly bigger.
Wednesday, November 15, 2006
Chic Purses from Threads Magazine
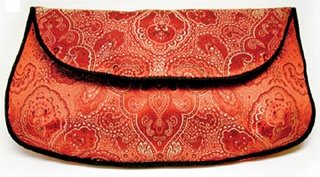
In this month's eLetter from Threads Magazine a link for free instructions for 3 Chic Purses was given. I particularly like the Pleated Pouch Bag, pictured below. I don't dare add this project to my already overgrown list, but I surely do like it! Perhaps one day in the future I'll just sew up all the handbags that I've been collecting links and patterns for. As much as I am drawn to handmade bags you would think that I owned a whole collection of them. The truth is, lately I've been carrying an ordinary, non-descript brown leather purse. Hmmm.... maybe I should make one of these cute purses and add some zip to my life....
Ruth
Ruth
Friday, November 10, 2006
Knit Maternity Top
I discovered again last night that I love to sew clothes. Clothing construction is so much more fun then all the home-dec stuff and craft stuff I've been doing. No long boring seams, no troublesome quilting issues, not rotery cutters and mats, and all the acessories, no projects that take weeks to finish and then have the "homemade" look. Just fun stuff like fitting and pressing, bindings and edgestitching, hemming, and then having an end product that looks like something I could buy in a store. It's so satisfying...
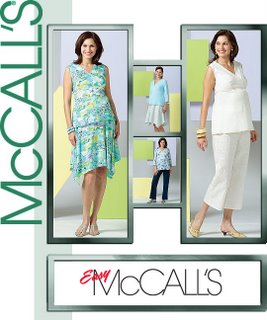
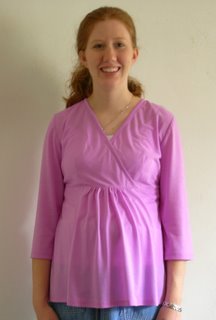
The pattern is McCalls 4880. It calls for woven fabrics, but seemed to work fine with my knit. The knit fabric I used below is a super cheap, thin knit that will probably pill and look horrible after a few washings, but I wanted to experiment with the fit and the look, and it was only $1 per yard. I have some nicer, light blue knit that I plan to use now that I know the pattern fits and works on my pregnany body!
The pattern doesn't actually have gathers across the front like my shirt does....I got the idea from the review of this pattern on Pattern Review. Basically I just added some extra inches to the center front along the fold of the lower piece, and then gathered the excess to fit between the notches when I sewed the lower front to the upper front pieces. The gathers are sort of different and trendy looking...and they certainly show off my tummy! I'm still trying to decide how much I like them.
The only issue I had was with some skipped stitches. I used a ball point needle, but I think it was the wrong size for such a lightweight knit because I didn't have any problems when the material was tripled (like on the binding). Also going slow and using a 2.5 stitch length seemed to help. I wish there were magic answers for all the tension and stitch issues I've been having lately. If anyone has experience sewing with knit fabrics, I'd love to hear any hints and tips!
Thanks for the comments...
Thanks for all the great comments trying to help me with my machine quilting on my table runner. Unfortunately I'm almost done, ( I have less then 1/4 of it to finish) so I don't want to pick it all out just to try a different thread for the bobbin thread. I need to figure out how to make the gold thread work, or just forget about the whole thing.
I am not giving up quite yet though. Here's my theory: At the point when I really started having problems, both the bobbin and the spool of thread were getting low. I think that perhaps as the thread was reaching the end of it's spool, it was changing the tension and creating the problems. So before I scrap the project, I'm going to buy a new spool of gold thread, start with a full bobbin, and see it I can't finish it. I'll let you know if I get it to work once I get the thread. I may also buy a metallic needle and see if that helps too.
Jessica
Progress on my living room!
Last weekend Justin's brother, Joshua (don't they look so much alike?), came and helped us get our living room plastered. This was a project that we'd been trying to do for months and months, and I was losing hope that it would ever get done...What a blessing it was for them to be able to finish the rest of the room in one day! Now we get to move on to painting! Yea!
Jessica
Jessica
Creating Cardboard Houses
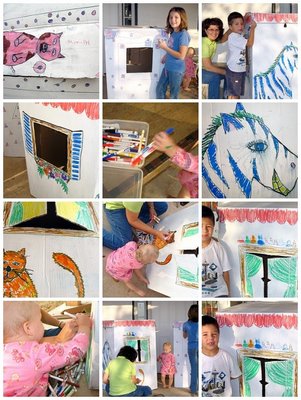
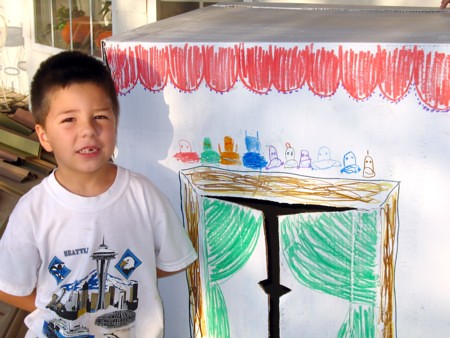
This week we have had fun making houses out of cardboard boxes. Ellen, Jacob, and I used house paint to cover the brown boxes, then we drew on the designs with markers. Since the markers smeared easily when touched, we sprayed the drawings with a matte finish. The kids have been having a lot of fun playing in their new houses, and I enjoyed the creating process, even though we're not great artists. :-)
Ruth
If you'd like to see the pictures close up, go to http://www.flickr.com/photos/callmeruth/. You can also see Ellen's blog at http://learningon.homeschooljournal.net/ to see what she had to say.
Ruth
If you'd like to see the pictures close up, go to http://www.flickr.com/photos/callmeruth/. You can also see Ellen's blog at http://learningon.homeschooljournal.net/ to see what she had to say.
Jacob lost a tooth last week. Don't you just love his toothless smile?
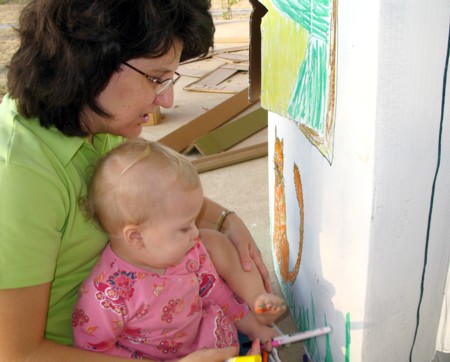
Emily even got in the act, "helping" as she could.
She got more markers on her feet and hand than on the box.
Take a look at her little orange piggies.
She got more markers on her feet and hand than on the box.
Take a look at her little orange piggies.
Wednesday, November 08, 2006
Fall Pumpkins Revisited
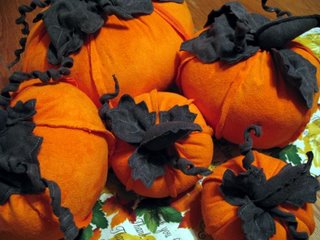
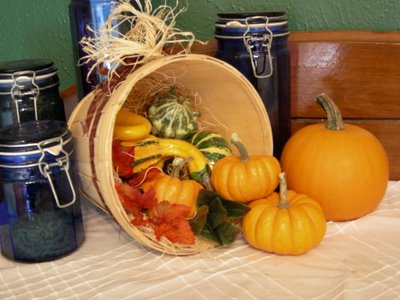
Another project finished! I started these pumpkins after Jessica posted a picture of similar ones and after I happened to see the orange fabric clearanced at Hancocks. Yes, I know that most of you decorated for Fall months ago, and that Christmas is just around the corner. But, hey, I'm just glad that I finished these this year!
The pumpkins were easy to make. Since the fabric does not fray, I sewed the seams wrong sides together. For the vines I laid a pipe cleaner in a strip of fabric and sewed alongside the pipe cleaner, enclosing it within the fabric strip. (Does that make sense?) The leaves are just two layers of fabric sewn wrong sides together. By machine I stitched the leaf veins. Overall, I'm pleased with the way the pumpkins came out. Jessica, next time you come over you can pick a couple to take home with you.
Oh, I also wanted to mention the table runner in the next picture. My mother made it for me last year for Christmas. The tablerunner is reversible with one side for Thanksgiving and one side for Christmas. I've enjoyed having in on my dining room table already this year.
On to the next project....
Ruth
Tuesday, November 07, 2006
Need help with machine quilting
Seriously frustrated sewist here...
I could use some help if anyone has any experience doing free-hand quilting (stippling) using metallic thread. I'm making a couple of table runners and quilting them with gold metallic thread in both the bobbin and the top thread. Yesterday I was able to get 1 and 1/2 of them done, (with some problems, but they were managable) but today I haven't been able to quilt more then 2 inches it seems without major issues. Here's what happens...I'll be sewing along, and suddenly the bobbin thread will catch and pull. If I try to just keep going, it breaks, and I have a break in my line of quilting. If when it catches, I stop and pull it off and start over, it'll start again ok, and then the same thing will happen several inches later. Also, about half the time it starts fine and looks ok until I realize that although the top threads lookloose, the underside of the stitching is a mess of loopy loops. I'm guessing this is a tension issue? I'm so frustrated that I am about to kill this sewing project...I don't know if it's my machine, or the thread I'm using, my needles, (I've already broken 2) or my technique, but I'm about ready to run out of my spool of thread now, so maybe I'll just wad it up and forget about having a beautiful fall table runner for my buffet in my dining room.
In a Slump
Today in my inbox I received the newsletter from PatternReview.com, and in it was an article by Welmoed Sisson. In her article, Welmoed gave a link to a free pattern for a bag re-printed with permission by Wild Ginger. The "Easy Tie Bag" looks easy to make (hence the name), and I think I'm going to add it to my growing list of things to make in the near future.
Lately I have been in a sewing slump....wanting to sew but never finding the time to do it. In days past, I never went more than a few days without sewing something. Those days are gone, I'm afraid. The older the children get the busier we are it seems.
Wilmoed's article is titled "Ways to Revitalize Yourself and Inspiration from Unusual Sources." She gives some excellent suggestions of ways to "restore your sewing mojo," as she puts it. If you also are in a sewing slump, take a look at the article. After a few days the article will only be available to Pattern Review members, so you may want to look at it soon if you're not a member.
Ruth
Monday, November 06, 2006
Crocheted Cradle Purse
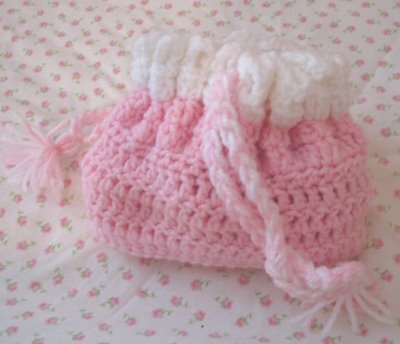
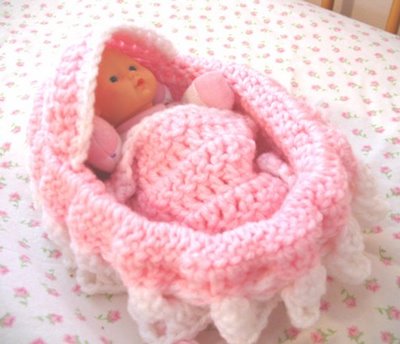
When Jessica and Heather were toddlers I made them each a "cradle purse" --a crocheted drawstring bag that folds down to make a doll bassinet. I came across the same pattern recently when I was going through things in my sewing room, so I decided to make a cradle purse for Emily.
In my previous post I mentioned how Emily had torn apart the pom-poms that were at the ends of the drawstrings. You can see here that I replaced the pom-poms with tassles, making sure they were secure!
Emily seems to like her purse, and she carries it around like a little girly-girl. She doesn't really play with the doll, though, other than to take it out of the purse and toss it on the floor.
If anybody wants the instructions, let me know and I'll email them to you. You could probably do a google search for cradle purse and find online instructions as well. The pattern was quite simple and crocheted up quickly. This would make a nice Christmas gift for little girls....hmmm, I should have saved this till then for Emily.
Ruth
EDIT: The instructions can be found at this link. http://www.oocities.org/crotiques/origcradle.htm
Wednesday, November 01, 2006
On the Needles--Knitted Socks
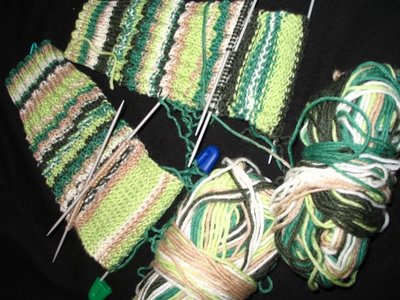
My next project on the agenda-- to finish these socks that I started last year! I came across these last week while cleaning out my knitting bag. The problem is that I don't remember what pattern I was using. Once I figure out how to do the garter edging on the heel flap I should be okay though since I can just do a stockinette stitch for the foot.
I enjoyed crocheting Jessica's sweater so much that I'm ready for more crochet and knitting projects. First off, I will finish these socks, and then I plan on knitting something for my new grandson coming in February. (I still have not gotten used to the idea of me being a grandma!) Oh, wait, I forgot that I promised Katie I'd knit a purse for her. Okay, I'll work on the socks simultaneously while knitting the purse, and then I'll start the baby project... and no, Jessica, I won't tell you what it's going to be. In the meantime, I need to finish the fall decorations I started--5 stuffed pumpkins and 1 Thanksgiving table runner, not to mention the shirt that has been cut out for 4 weeks and is still waiting to be sewn (a gift for Katie, once again).
On a sidenote, this week I made Emily a crocheted "cradle purse" which she liked so much that she took it with her to bed one day at naptime. When I went into her room later I found little strands of yarn all over the her crib and on the floor. The little stinker had taken apart the drawstring pom-poms, strand by strand! I'll post pictures of the cradle purse after I fix the drawstrings. I think I'll try tassels this time instead of pom-poms.
Until next time,
Ruth
Library Sale Finds
Check out the books I found at my library's annual used book sale!
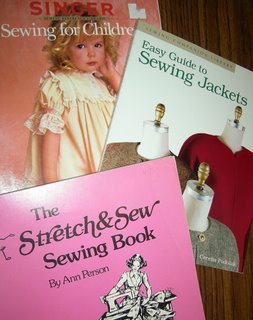
I have always loved books, and library sales are an excellent way to build one's book collection. We spent $6 and got 11 books--these sewing ones and 4 others that Justin picked out. Here are my sewing finds.
The Sewing for Children and the Sewing Jackets books will be good references as I work on stuff in the future. I have almost no sewing reference books of my own, so I was excited! The Stretch and Sew book is pretty dated, but it still looks like it has some very good info about sewing with knits in it. I got it just in time for me to sew some knit maternity shirts. I have 3 knit fabrics in the dryer right now, prewashed and almost ready to go!
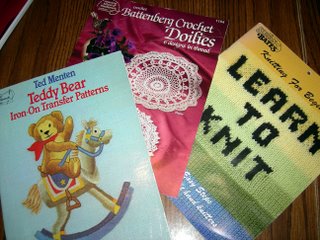
These booklets are just a few that I thought would be fun to do something with someday...nothing planned right now. I learned to crochet using a similar looking book from Mom, so I figure that when I decide to learn to knit, this booklet would be a good one to start with. Someday I might want to crochet a doily, and one can always use cute teddy bear patterns, right?
This is a newer craft book with some of the sweetest inspirations and cutest craft ideas. I'm going to enjoy reading it, and doing some of the crafts with my little sisters, and my own girls someday.
ttyl,
Jessica
Sunday, October 29, 2006
Crocheted Sweater--Pattern Review
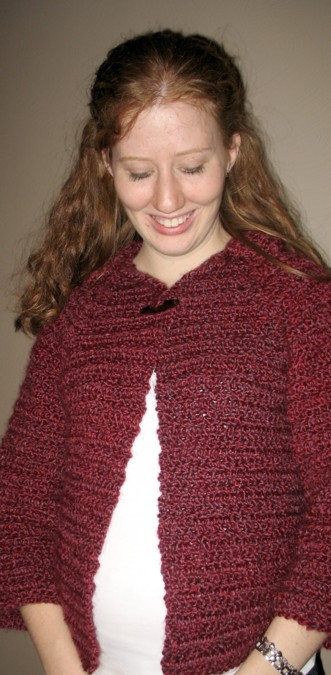
It's finally finished! One and a half months after starting this sweater for Jessica, I finally finished it and gave it to her today. Jessica seemed to like the sweater, so that made me happy. :-) Doesn't Jessica look lovely at 5-1/2 months pregnant?!
Ruth
The pattern I used was a freebie from Hancock Fabrics called the "Matinee Swing Jacket." I thought I would review this croched pattern following the format found at Patternreview.com.
Pattern Description: A crocheted swing style sweater jacket with 3/4 length sleeves.
Did it look like the photo/drawing on the pattern envelope once you were done sewing with it? Yes, except for the neckline
Were the instructions easy to follow? This pattern is rated for intermediate crocheters, and I will agree. Other than baby sweaters, this is the first adult garment that I've crocheted. I found the instructions easy to follow, but I did have a few problems with the instructions for the front pieces.
What did you particularly like or dislike about the pattern? I liked that the pattern did give good illustrations of each piece which was helpful to me as a first-time sweater maker. However, I did feel like the instructions were vague when telling how to decrease in the front sections. The instructions did not give specific stitch counts and when I got to the end I found I did not have enough stitches. I had to undo several inches and start over several times before I got it to work out right. Even so, the neckline ended up being too tight.
Yarn Used: Lion Brand Homespun in the color "Antique."
Pattern Alterations or any design changes you made: I lengthened the sweater by 2 inches, but I think I should have lengthened it even more. Jessica has a long waist, and it seems a bit short on her, in my opionion. Of course, it may just be her pregnant belly making the sweater seem short-waisted.
Also, in order to accomodate the tight neckline, I ended up closing up the buttonhole and sewing the button down a few inches lower than the pattern called for. This created a bit of a lapel which both Jessica and I liked better anyway. We used a toggle button which really looks good.
Would you crochet it again? Would you recommend it to others? I might make it again---this time for myself. :-) I'd recommend it with precautions about the front sections.
Conclusion: Overall, I am very pleased with the sweater. Other than the problem mentioned above, the sweater went together very well. It was easier than I thought it would be to crochet, and now I'm ready to attempt something more complicated.
Wednesday, October 25, 2006
Easy Autumn Felt Crafts
For this pumpkin pincusion, I basically used the Paisley Pincusion pattern, but mine came out larger then I wanted because I didn't do the extra line of stitching on the seams to make "petals" like the pattern shows. I forgot to read the directions...oh well. I still like it!
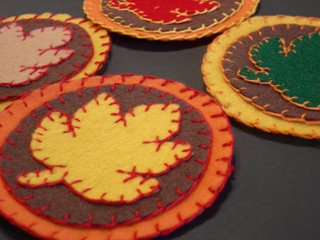
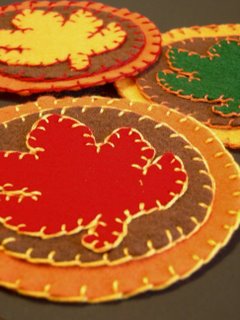
This felt coaster set has been so fun to work on this week! The pattern was from a library book, Holiday Touches for the Country Home, and it was so easy.
To duplicate them, cut out two circles, one larger then the other, and a maple leaf design from contrasting colors of felt. Layer them, secure the layers with craft or fabric glue, and them stitch them together with a blanket stitch in a contrasting color. Use 6 strands of embroidery thread for the blanket stitching.
I want to make some Christmas coasters next...I thought I would just use my Christmas cookie cutters as simple patterns for a tree, star, stocking, snowman etc.
Monday, October 23, 2006
Fall Decorating
Last week the holiday bug hit me and I've been feeling like creating, and cooking, and puttering, and nesting in my little house. Saturday we finally broke down and bought the electric fireplace and mantle for out living room that we've wanted for so long. Our living room is so cozy....I love it.
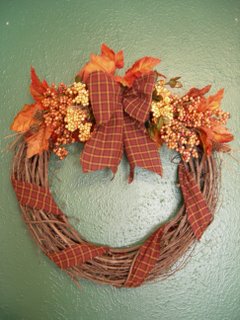
This is my new fall wreath in my eating area. I know it doesn't look the best on the bright green wall, but for right now, that's just the color the wall is, and I live with it.
This little project was so easy to make...and fairly inexpensive. I'd gotten the wreath at a garage sale last summer for $2, and the fake leaves and berries I got at WalMart--3 little bunches at $0.94 each.
First I used some leftover fabric scraps from another project to wind around the wreath (about 1/4 yd). I ripped the strips rather then cutting them to create a ragged look.
Secondly I cut the 3 bunches of leaves and berries apart into individual stems, and then used floral tape to bunch them up separately, 6 little bundles, 3 for each side of the wreath. I laid bundles on the wreath to see where I wanted them to go and then wired them in place, starting with the leaf bundles on the bottom, the orange berries overlapping them, and then the yellow berries on top. To finish I simply wired a big bow in the center and secured a couple leaves in at the top to cover a bare spot.
Tuesday, October 10, 2006
Free Clutch Purse Pattern
This morning I came across this free clutch pattern from Kwik Sew.
I thought it was really cute and would be fun to make for a special event, or just for a fun makeup bag! It would be easy to dress up with trims, embroidery, applique, or beading.
I also been enjoying all the pictures at Emma's Sewing Site. I'm in the mood to do some garment sewing again, and all her maternity and nursing sewing is inspiring.
Today is a rainy day and I feel like sewing! Yea!
Jessica
Saturday, October 07, 2006
Curtain Pictures
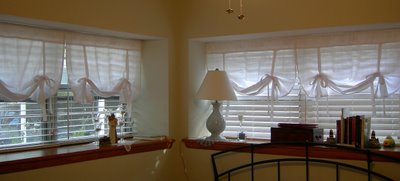
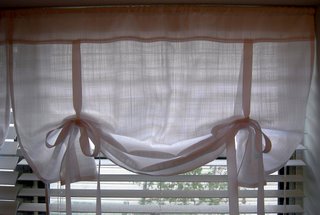
Well friends, I finally finished sewing the curtains for my bedroom. Home-dec sewing is not my specialty, and I found all the ironing and sewing of long seams to be extremely boring. But after weeks of procrastinating, I think it was worth it-- we absolutely love how they look in our bedroom!
For these curtains I used Simplicity 5390. I had to shorten it considerable because my windows aren't full length. I also made the top band quite a bit narrower then the pattern piece simply because of the proportions of my windows. I didn't want the band to take up half of the curtain.
I used a white linen fabric that Justin and I picked out together. The length of the curtain is adjusted with matching or contrasting ties. Instead of using fabric ties as the pattern called for, we bought white 7/8" grosgrain ribbon. I really like how the ribbon ties look with the white linen--they add another texture to the overall look.
Now that these curtains are finally done, I am ready to move on to other projects! Mom and I are both making autumn dresser scarves...incidentally we are both using the exact same fabrics--fabrics that we picked out independantly of eachother! Hopefully we'll get them done soon so we can enjoy them for awhile before Thanksgiving....
I'm also working on my wedding album. Last night while Justin was working late I enjoyed several hours of quiet time arranging and re-arranging pictures for pages. I've had the pictures for some time, but I'm just now starting to put them all into the album.
I'm also hoping to start a crochet project soon...a baby blanket...in blue!
Cheers!
Jessica
It's A Boy!
Justin and I had an ultrasound last Thursday and we were excited to find out that we're having a baby boy!
Everything looked good with the baby...all the measurements were normal and the technician didn't see problems or concerns. We are blessed that God is giving us a healthy pregnancy and baby thus far.
I just thought everyone would want to know!!
Jessica
Tuesday, October 03, 2006
Bridal Shower Craft
Saturday, Mom and I hosted a small bridal shower for a dear friend of mine, Tonya. She's getting married in less than 2 weeks and we were so excited to celebrate with her.
The luncheon menu consisted of Italian soup, Chicken salad sandwiches, Ham and cheese sandwiches, and sides of pickles and olives, cheese and crackers, and grapes. For dessert we had fancy little petit-four cakes, and cream cheese eclairs.
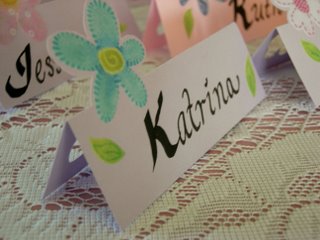
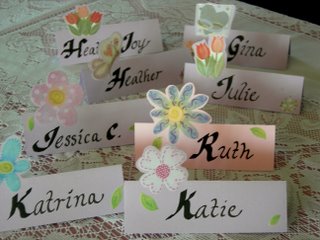
I made little name place cards for each person, and I thought they came out cute! They were so easy to make and gave a very elegant feel to the place settings.
To made them, I cut rectangles of purple and pink cardstock, 3" by 4 1/2". I placed the stickers on them so that they would stand well above the center when the card was folded in half lengthwise. I semi folded the card in half carefully, trying not to bend the sticker too much. I then used an x-acto knife to cut out the outline of the sticker on the top half. Once the sticker was cut out, I was able to completely fold the card and write the names on them with a calligraphy pen.
Friday, September 22, 2006
Felt Pumpkin Craft
These free felt pumpkin patterns from AOK Corral are really cute. I've been thinking about doing some fall decorating, and these would be so fun and easy. Also, for those of you who like to make cute pincushions, I think the smallest one would probably be the perfect size for an adorable autumn pincushion.
Thanks to Mrs. Wilt for the link!
Jessica
Thanks to Mrs. Wilt for the link!
Jessica
Three Vintage Apron Patterns
Here are a 3 vintage apron patterns that were in the box of patterns one of our readers sent to us. We love vintage aprons...they are so inspiring!
The pattern on the top right is copyrighted 1966. The view on the left is designed for vinyl coated fabrics. It's shown made from a clear vinyl...I think it would be pretty funny to have a see-through apron! I really like the other view though...it looks very practical.
The pattern on the bottom right is very old...1940s or 50s I'm guessing. It is missing the envelope, and the pattern pices are not marked with lines... just stamped with a number to differentiate them. These are really sweet, feminine aprons for girly girls like me!
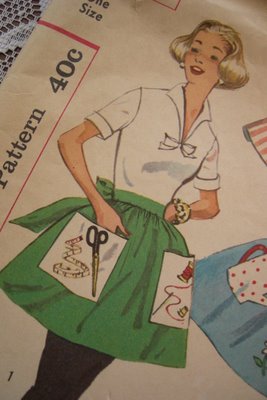
The apron pattern in the middle is just a pretty traditional, gathered half apron. I thought the different appliques were neat. An apron for serving tea, an apron for gardening, an apron for Valentine's day, and lastly an apron for sewing. How much fun!
Cheers, Jessica
Subscribe to:
Posts (Atom)