Showing posts with label Home Decor. Show all posts

Thursday, May 07, 2009

Wonderland Pillows

The first bit of my birthday fabric has been cut into! Fabric is from the Wonderland line by MoMo. I LOVE it!

Piping was a new technique for me. I don't know if I did the the "right" way or not, but I got it on! I actually made my own piping by taking one of those packs of bias binding sitting around that I never use and sewing cord (well actually I cheated and just used jute because I didn't have any cord) into the fold of it to create my own piping. It worked pretty good.

I would not recommend jute if you can find something better because it isn't all the exact same thickness...so the piping feels thicker and thinner in spots. Also, it was rather stiff and wiry, so it made the corners slightly difficult. But, in a pinch, it works!


These look so good in my living room, but they were actually a gift for my wonderful sis, Katie. She's been revamping my old room into a really cool, modern, college girl room. The walls are light blue from when I lived at home, and she is working with that and doing everything in pale blue, red, charcoal, and chocolate brown. It looks really good...much better then when I lived there and tried to make it all shabby chic.

Blessings,
Jessica

Monday, March 10, 2008

Decorating my Kitchen at the Thrift Store


So now I'm officially doing my kitchen in colbalt blue, hunter green, and mustard yellow. Probably not the most appealing combination, but it's working for me. Originally I just wanted to do just blue and white in my kitchen, but we ended up getting a house with hunter green countertops. What works with hunter green and blue? Mustard yellow!

I recently found this fancy muffin tin at my favorite thrift store. $0.79! Several days later, matching yellow mugs turn up. $0.39 each!


I think my new tin and mugs make a a pleasing arrangement over my stove!

Cheers!
Jessica

Friday, January 04, 2008

Sewing Room Makeover Part 2

New Curtains!

For my sewing room curtains, I was able to save some money by using the leftover length of fabric from my bedroom curtains, and I was able to still do a style and color that I wanted. This valence is extremely simple-- no pattern required! I simply hemmed all 4 sides of my panel of fabric, and folded the top half over to create the casing for the curtain rod. The buttons tack the casing down and that was it! I used 10 shiny mother-of-pearl type buttons. Total cost was $5 for the buttons (and those were even 1/2 off!).

Decorating pictures next time!
Jessica

Wednesday, January 02, 2008

Sewing Room Makeover Part 1

My sewing room is getting a makeover this new year. Over our Christmas break, Justin and I painted the room a light buttery yellow color. Then Justin re-painted one of the walls white for me because I decided it was too much yellow. =) He's really sweet.

Now I'm in the process of re-organizing and decorating. Today I hung pictures, and the new curtains are almost done. I just need to sew the buttons on...more pictures later!

Cheers!
Jessica

Friday, February 09, 2007

Frugal Fridays--Decorating the Nursery

A couple weeks ago, my sister Katie came over and helped me finish the painting and decorating in the nursery. I was so pleased with how our walls came out that I just have to share some pictures!

We had already painted 2 of the walls in the bedroom a medium blue, and the remaining walls white and lime green, but they just needed something else, especially since I didn't have a lot of decor type stuff to hang up. To finish the look, we used foam stamps from Michaels and stamped star galaxies here and there on the walls in a navy blue paint.

I was very pleased with how little time and money we had to put into finishing his room. The stamps and bottle of paint were under $1 each, and the curtains were made using $1 fabric. The total spent on the walls, counting the 2 gallons of colored paint was only around $35.

For more frugal Friday tips visit Crystal's blog.


Curtains for the baby room

Well, I'm 39 weeks and our baby is not here yet...hopefully he'll come soon! In the mean time I've been busy...sewing curtains for the nursery! I was so pleased to find this fabric at Wal-Mart on the $1 a yard table. It is a medium weight decorator type fabric, and the green color was a perfect match to the green paint we have on one of the walls.

Basically I made these curtains from a picture I'd seen--I didn't have a pattern. I measured the length of the rods and after determining how long I wanted the valences to be, I then added additional inches for the side and bottom hems, the casing, and the center box pleat. I then cut the fabric and began the process of hemming all the sides, sewing on the ribbon trim, pinning in the box pleat, and making a casing at the top for the rod. Long boring seams, but they are done now, and I'm really quite happy with the finished product!

Jessica


Friday, January 26, 2007

Frugal Friday Tip

I have several sewing projects I'm working on for the baby room, and this week I was excited to actually finish one! Because I received several new sheets for my crib at my baby shower, I didn't really need the older used crib sheets that came with crib and changing table we had bought. The more I look at the old sheets the more ideas I'm coming up with to use all that extra fabric for! One of them I'm using to make a liner for a wicker laundry basket (not finished yet) and the other one I was able to remake into two changing table sheets. I was pleased because we are doing the baby room in blue, yellow, and lime green, and this extra sheet just happened to be a light yellow plaid!


Basically I took the sheet and cut off the elastic so that it would lay flat. I laid the changing table pad over it and cut a rectangle about 3 or 4 inches larger then the pad all around. I pulled the raw edges of this rectangle up over the pad, right sides together and pinned in mitered corners so that it fit snugly around the pad. Then I carefully took it off the pad and sewed where I'd pinned to create the mitered corners. I finished it by hemming the raw edges all around on the inside.

Hopefully this makes sense...perhaps these closeups of the underside will help...

For more frugal tips visit Crystal's blog at Biblical Womanhood.


Friday, November 10, 2006

Progress on my living room!

Last weekend Justin's brother, Joshua (don't they look so much alike?), came and helped us get our living room plastered. This was a project that we'd been trying to do for months and months, and I was losing hope that it would ever get done...What a blessing it was for them to be able to finish the rest of the room in one day! Now we get to move on to painting! Yea!

Jessica


Monday, October 23, 2006

Fall Decorating

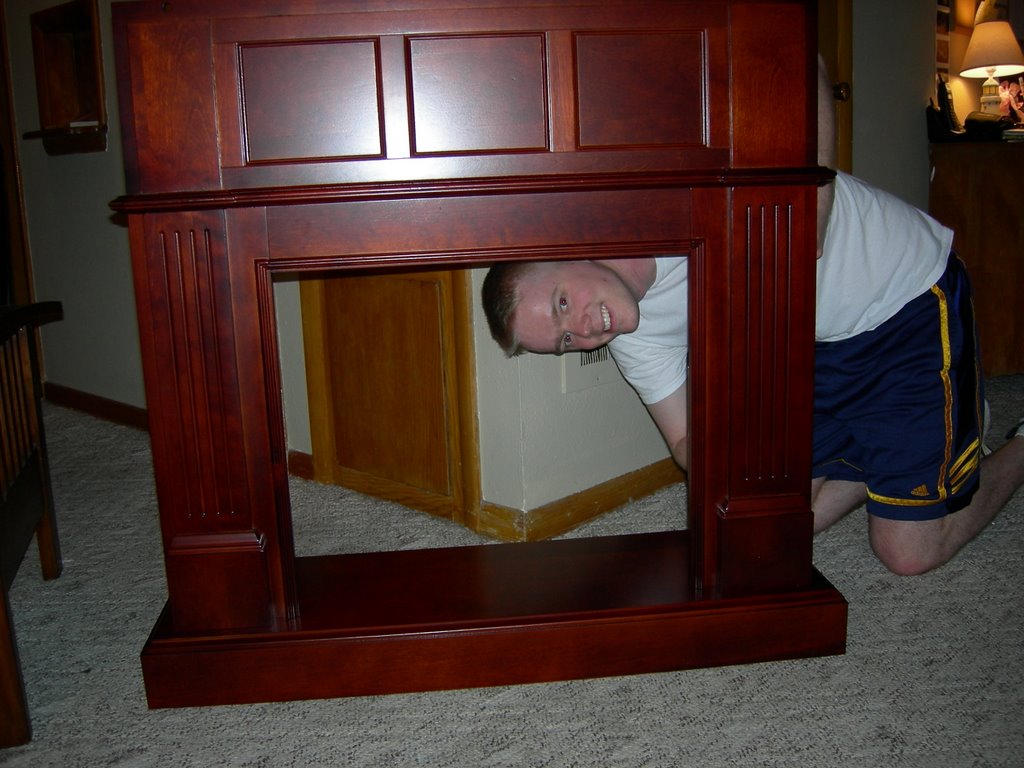
Last week the holiday bug hit me and I've been feeling like creating, and cooking, and puttering, and nesting in my little house. Saturday we finally broke down and bought the electric fireplace and mantle for out living room that we've wanted for so long. Our living room is so cozy....I love it.

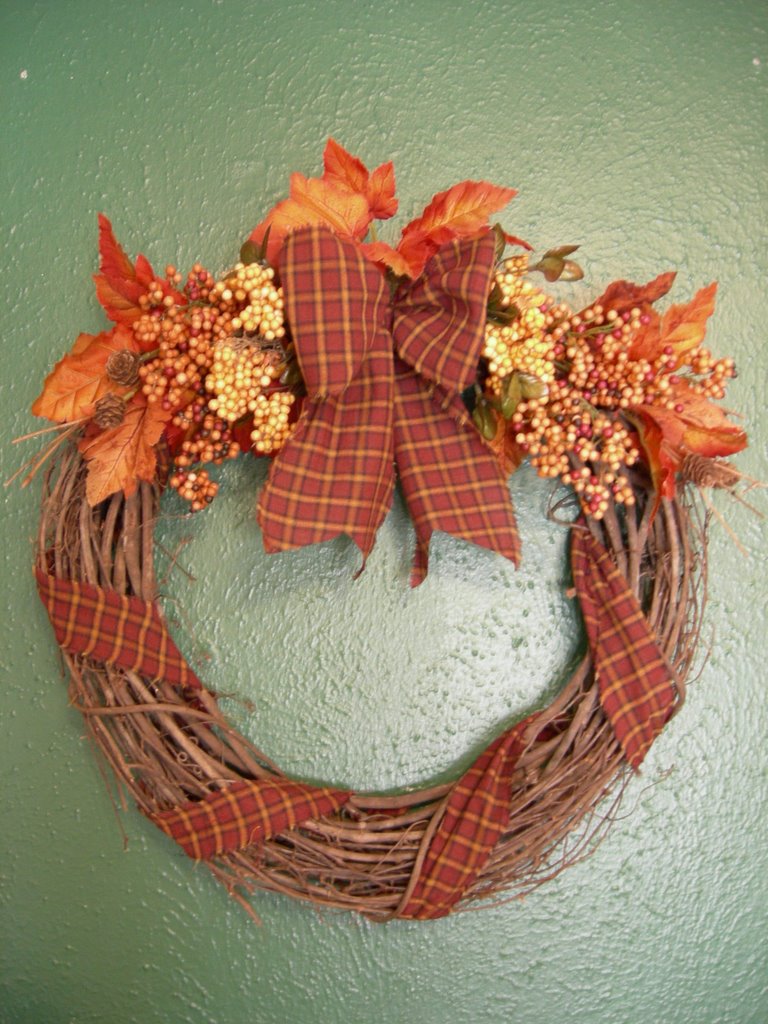
This is my new fall wreath in my eating area. I know it doesn't look the best on the bright green wall, but for right now, that's just the color the wall is, and I live with it.

This little project was so easy to make...and fairly inexpensive. I'd gotten the wreath at a garage sale last summer for $2, and the fake leaves and berries I got at WalMart--3 little bunches at $0.94 each.

First I used some leftover fabric scraps from another project to wind around the wreath (about 1/4 yd). I ripped the strips rather then cutting them to create a ragged look.

Secondly I cut the 3 bunches of leaves and berries apart into individual stems, and then used floral tape to bunch them up separately, 6 little bundles, 3 for each side of the wreath. I laid bundles on the wreath to see where I wanted them to go and then wired them in place, starting with the leaf bundles on the bottom, the orange berries overlapping them, and then the yellow berries on top. To finish I simply wired a big bow in the center and secured a couple leaves in at the top to cover a bare spot.

Justin putting together our mantlepiece for the electric fireplace.


Happy Thanksgiving!


Saturday, October 07, 2006

Curtain Pictures

Well friends, I finally finished sewing the curtains for my bedroom. Home-dec sewing is not my specialty, and I found all the ironing and sewing of long seams to be extremely boring. But after weeks of procrastinating, I think it was worth it-- we absolutely love how they look in our bedroom!


For these curtains I used Simplicity 5390. I had to shorten it considerable because my windows aren't full length. I also made the top band quite a bit narrower then the pattern piece simply because of the proportions of my windows. I didn't want the band to take up half of the curtain.

I used a white linen fabric that Justin and I picked out together. The length of the curtain is adjusted with matching or contrasting ties. Instead of using fabric ties as the pattern called for, we bought white 7/8" grosgrain ribbon. I really like how the ribbon ties look with the white linen--they add another texture to the overall look.


Now that these curtains are finally done, I am ready to move on to other projects! Mom and I are both making autumn dresser scarves...incidentally we are both using the exact same fabrics--fabrics that we picked out independantly of eachother! Hopefully we'll get them done soon so we can enjoy them for awhile before Thanksgiving....

I'm also working on my wedding album. Last night while Justin was working late I enjoyed several hours of quiet time arranging and re-arranging pictures for pages. I've had the pictures for some time, but I'm just now starting to put them all into the album.

I'm also hoping to start a crochet project soon...a baby blanket...in blue!

Cheers!
Jessica

Tuesday, December 06, 2005

Pictures of Past Projects

I thought I'd post a few pictures of some of the sewing projects I've done in the past since I don't have pictures taken of the more recent things. These little purses were made from an Amy Butler pattern called the Dorothy Bag. Katie and I each made two using fabric from my stash. She gave 3 of them as gifts and I kept one. These patterns were simple to make, but in my opinion, the directions were too wordy. :-) The green purse was adapted from another pattern that I found clearanced at a local shop. I don't remember the name of the pattern, but I love how this purse came out. This was my first time to put in a magnetic clasp, and I found it quite easy to do. The fabric is from Amy Butler's Ginger Bliss collection. Everytime I use this purse, I get lots of compliments. In the second picture you can see all the pockets I added to the inside.


The next several pictures are some items I have made for Emily. Since I mostly use cloth diapers on Emily, I enjoy sewing diaper covers in cute print fabrics. The diaper covers are made with an inner layer of leakproof PUL (polyurethane laminated fabric) and the outer cover is a cotton print. I have bound the edges in foldover elastic.


The knotted star dolls are some that I made for baby gifts. I think I made 10 or so in both blue and pink and have given most of them away. Of course, I kept a pink doll for Emily. The dolls were from a pattern I found online, and when I find the site, I'll post the link. These dolls made up fairly quickly, and they make great gifts. Another gift idea is the embellished burp cloths. I made these for Emily by adding a border of fabric to edges of store-bought prefold diapers. Two of the burp clothes were made from birds-eye diaper fabric, and I hand-embroidered the little animals on the fronts.

Pictured next is a little snuggy blankie that I made for Emily out of one layer of flannel and one layer of fleece with ribbon loops around the edges. After seeing an expensive brand of these little blankies online, I just had to make one myself. I had so much fun choosing the ribbons and sewing this up, and my version didn't cost 1/4 of the "name brand" blankies. Emily loves to finger the ribbons and put them in her mouth.


Well, I just have to add two more pictures! Emily is now 7 months old and is my sweet little darling baby. At times it feels a bit surrealistic to me to have both a 21 year-old daughter (Jessica) and a baby at the same time, but both are dear to my heart (along with my other children of course!) and I wouldn't trade either of them for the world.

Ruth